
Thanksgiving Preparations: Part II. Smoked Ham Stock, Chocolate Bark Two Ways, and More
November 18, 2009 by The swedish meatball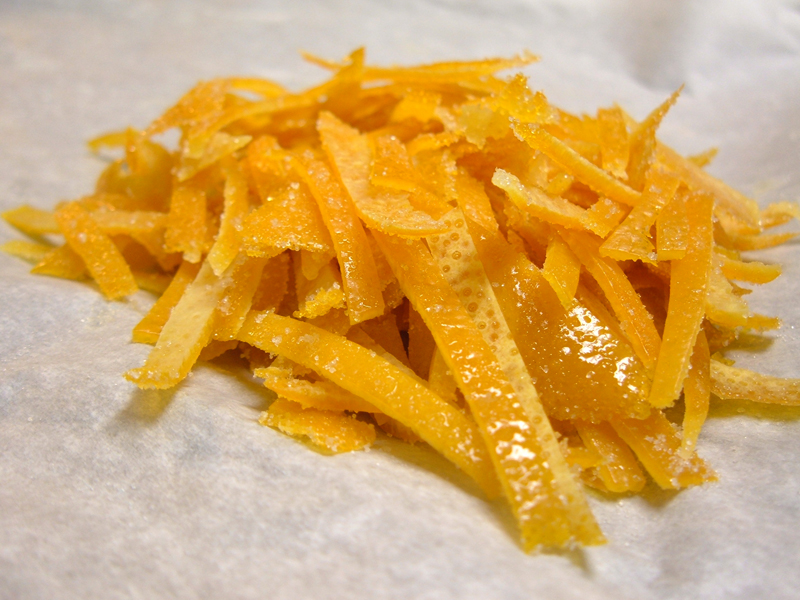
Week 2 is already finished, and my plans are on schedule. Among other culinary trips (see the new beef stroganoff and updates to cranberry orange bread), this week’s accomplishments include smoked ham-vegetable stock, peanut butter milk chocolate bark, candied orange zest, dark chocolate bark with said zest, potato rosemary rolls with roasted garlic, brown roux, and a test run on roasted chestnuts.
Smoked Ham-Vegetable Stock
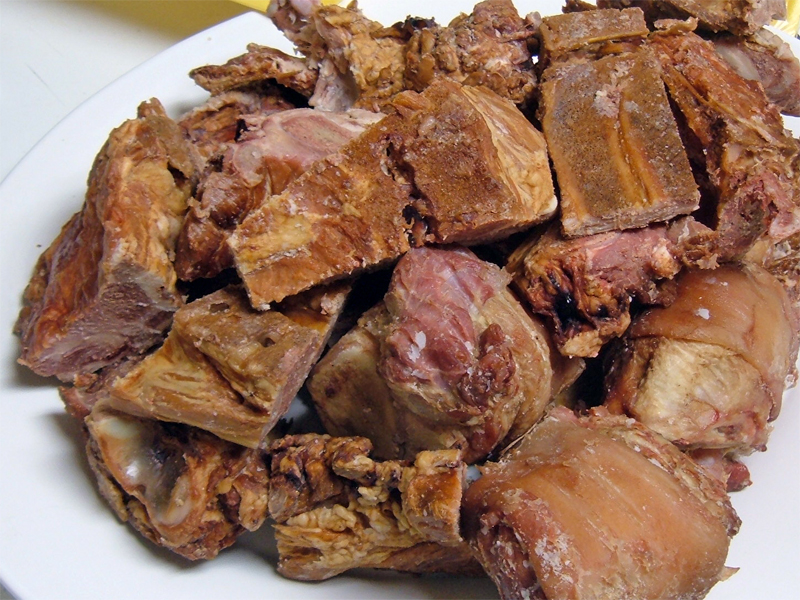
If you haven’t cooked with smoked ham bones before, you’re missing out. The smell of this stock will permeate your entire kitchen with smoky savory aromas. Just be sure to use genuine smoked products, as the grocery store will occasionally pass off artificially colored and flavored products as "smoked." (Insert glare directed at Albertsons.) Check the ingredients list, if one is included. Curing salts like sodium nitrite are ok because they prevent food poisoning. Sugar is ok. Regular salt is ok. Try to avoid everything else.
There’s about 2.5 lbs of white mirepoix in this recipe, edging the stock towards a vegetable-ham stock rather than a pure smoked ham stock. The reason for this balance is simple: I plan to use part of this stock for an (unconventional) green bean casserole, and maybe another part for split pea soup. If you’d prefer a more traditional ratio of ham to mirepoix, use 8 lbs: 1 lb.
Important: do not add any salt to this stock. The smoked ham will naturally salt the stock and further seasoning is detrimental.
Ingredients
6.09 lbs smoked pork neck bones and smoked ham hocks
21 cups cold water
553g leeks (about 6-7 leeks)
276g celery root (about one root)
276g parsnips (two medium-large parsnips)
0.18 lbs dried mushrooms (2.88 ounces)
1 extra large sachet (thyme, parsley stems, bay leaf, peppercorns, half a ceylon cinnamon stick)
- Place the smoked ham and water in a non reactive stockpot. Bring to a simmer and set a timer for 1 hr and 30 minutes. Skim as needed.
- When the timer goes off, prepare your mirepoix. Apply a ½ inch dice to the leeks, celery root, and parsnips. To cut the celery root, remove both ends of the root. Use a vegetable peeler to take off the outer skin. Set the root on a flat end, so the root remains stable on your cutting surface and doesn't roll. Then slice to obtain "rounds." Lay the slices flat on the table and apply a crosshatch slicing pattern. Treat parsnip as you would carrots. Optional: cover the vegetables and sweat them for 10 minutes over medium-high heat.
- Add the mirepoix and dried mushrooms to the stockpot.
- Assemble the sachet. Place in the stockpot.
- Simmer for an additional hour. Then strain through damp cheesecloth, chill, and store in the refrigerator or freezer.
Further comments on the ham stock will be forthcoming when I assemble my cream of mushroom soup.
Potato Rosemary Rolls (Or Knots, Whatever)
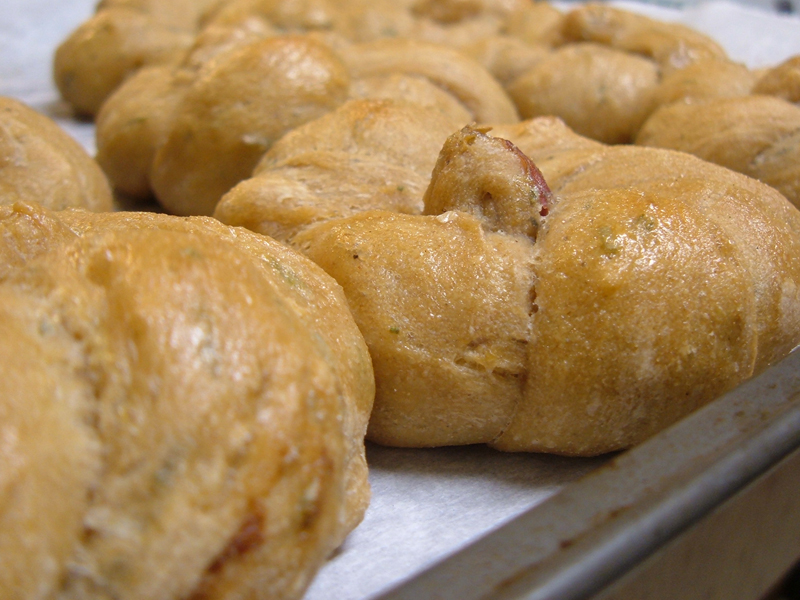
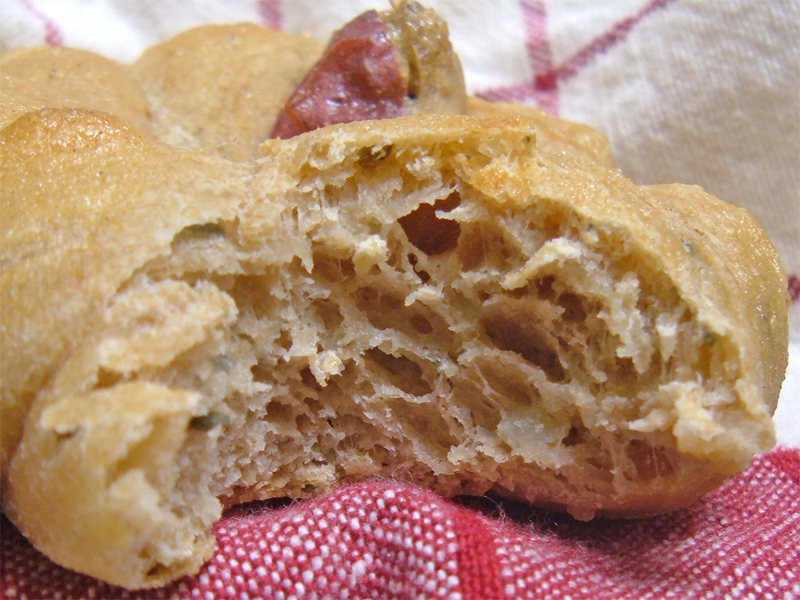
Once upon a time, when Jenn was a wee little girl wearing pigtails (gag), I rated restaurants based on the quality of their bread. Sad, but true. Nowadays, I just accept as given that most restaurants serve crappy filler bread. But if I’d had access to these buggers 20 years ago, my parents would have been forced to drag their little girl away from the establishment selling them. Because seriously, these things are bloody dangerous! As in: danger, keep away or you may turn into a blimp!
It’s terrible and totally unfair to ask for my objectivity in this matter. I have a soft spot for garlic when properly utilized and not overpowering. Put balanced quantities of roasted garlic, fresh black pepper, and fresh rosemary into soft, tender dinner rolls (knots! ok knots!), and my neurons cease to function in any coherent manner. Rationally, I know that’s not the best bread I’ve had. I honestly prefer the more complex flavors of a good rye bread or sourdough. The salivating reaction to potato rosemary rolls is completely out of my control, an unconscious reflex. Perfect for Thanksgiving.
I will say this much: I infinitely prefer these rolls to my last batch of potato rosemary bread. Why? Several reasons: first, less garlic! That’s counter-intuitive to most garlic lovers, I know, but the last batch was way over the top. I don’t know how Peter Reinhart arrived at his figure of 28.5 grams, but that amount of garlic just about blows you right over (and not in a good way); the spicy acidity of the garlic becomes tremendously unappetizing. I used about 5 cloves of roasted garlic, and that was pushing the limit. Second: matching the form factor with the style of bread. I don’t really want to eat potato rosemary bread sandwiches, sorry. And while you could serve slices of sandwich bread with dinner, that’s a little odd and not nearly as convenient. Rolls are the way to go if you’re using an enriched recipe. On the other hand, if you were to create a lean, crusty (hearth) version of potato rosemary bread, I could see that being served with dinner. However, the crumb would need to be larger, which might render the use of the softening potato inert. Hmm.
The final weight of the dough was on target at 1103 grams. I avoided using any extra flour until the shaping process—good intuition on my part, because the dough would have been excessively dry otherwise. Shaping was another challenge. The dough was very tacky, verging on sticky, before shaping. It was impossible to roll a snake without first throwing down a little extra flour on the counter; and then, usually, you needed to lightly flour the snake before knotting, because otherwise the knot would start sticking to itself before the process was even finished. Also, one more tip: after the first knot, always wrap the end facing outward dead last. Otherwise, the end piece is usually off to the side, instead of in the center.
Brown Roux
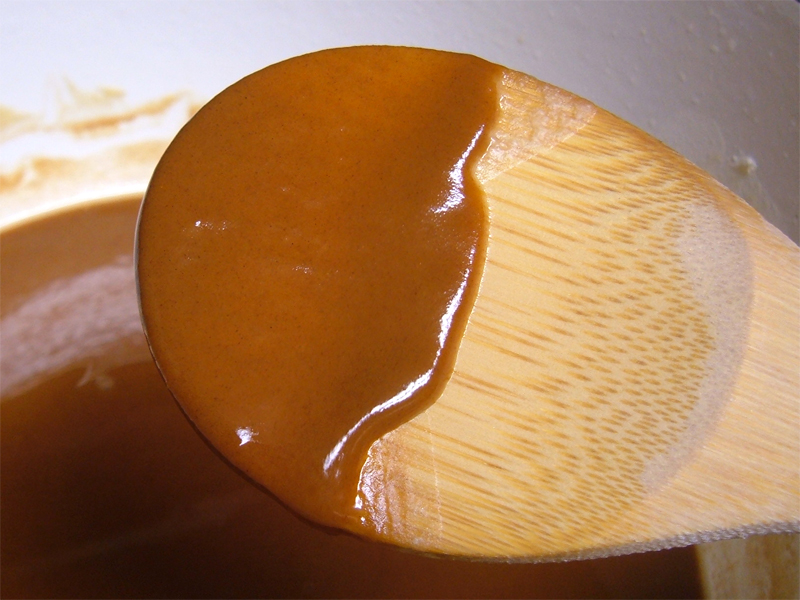
Cajun cooks have long perfected the art of roux for classics like gumbo. If you’d like to hear roux advice straight from Louisiana, I’d highly recommend viewing this video from Donald over at The Bayou Gardener. The apartment complex manager would have a fit if I tried to setup a woodburning stove on my patio, but despite being produced on a regular electric stove, I’d say my roux is still a pretty respectable milk chocolate. My enameled cast iron dutch oven works fabulously well for this application; the bottom has no edges or corners, meaning I can easily reach every square inch of the pot while stirring.
Donald recommended a 3:2 ratio by volume. Curious, I measured 1.5 cups of flour, 1 cup of canola oil, and converted to a ratio by weight. Turns out, the ratio is about 1:1! This calculation, combined with the excellent results, just about confirms my previous opinion that 1:1 is far superior than a 3:2 ratio by weight.
As to the method: I deviated from Donald’s recipe in only one aspect, mainly for the sake of experimentation. I first used the oil to fry pieces of fatty smoked ham cut from old neck bones; after a few minutes, when a wonderful scent of smoked meat was imparted to the oil, I poured the oil (and ham) through a fine sieve. The scented oil was then brought back up to the appropriate temperature and used to create a roux. Unfortunately, I couldn’t really pick up the taste of ham in the final product—just the nuttiness you’d expect from the roux. No bonus, but no harm either. Next time, when I’m feeling more adventurous, I may substitute a bit of the canola oil with rendered bacon fat.
220g canola oil, reused (see explanation above)
220g all purpose flour
Preheat the oil and the cast iron to the desired temperature, which is about 4.5 on my electric stove and a little higher than the temperature of a simmer for a full stockpot. Then stir in the all purpose flour. (You can use a whisk, but if you’re using enameled cast iron, the metal whisk may harm your pot. I used a wooden spoon.) Keep stirring. Stir, stir, stir. Do not answer the phone. Do not answer the door. Do not leave to watch The Prisoner or, kami forbid, a ripped copy of that overhyped vamp chick-flick. (Girls, get a life.) Stir and do not stop until the roux reaches the color of milk chocolate, about 30 minutes. Remove the dutch oven to a cool burner. Then stir 5-10 minutes more, while the cast iron cools. Allow the roux to cool to room temperature. Then refrigerate or use.
A piece of advice I should have mentioned in my last short article: roux works best when (a) cool roux is combined with hot liquid or (b) warm roux is combined with liquid at about 200°F. Technically, you may also combine hot roux with cool liquid, but as this may spatter, I don’t suggest you try this method. Personally, I prefer Method A.
Chocolate Bark Two Ways
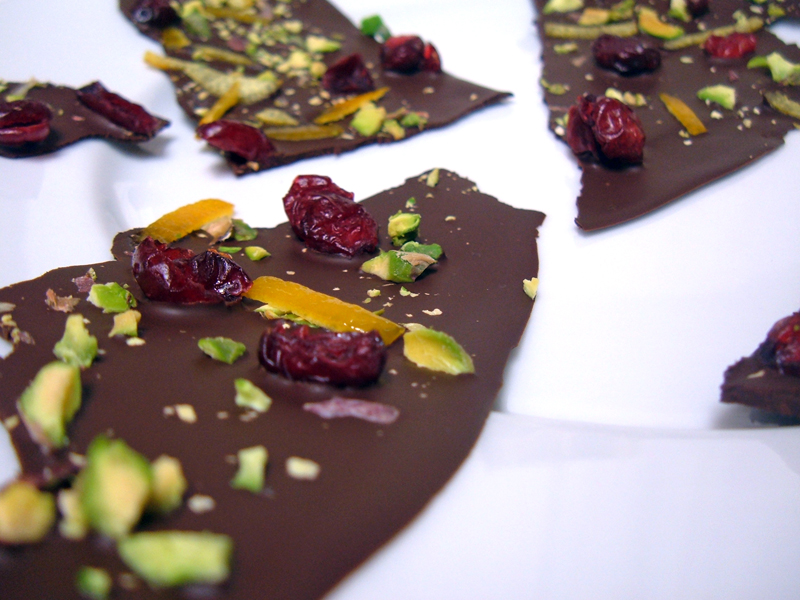
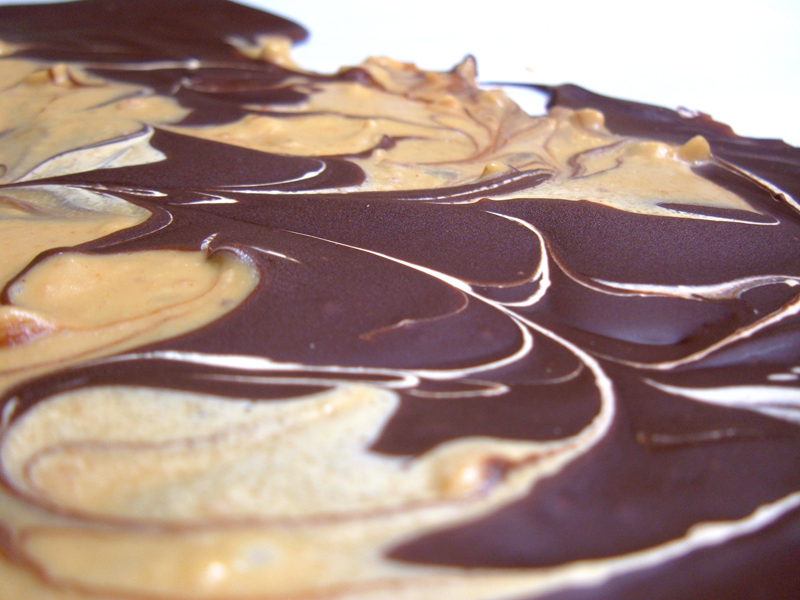
Manipulating chocolate is either extremely easy or very vexing, depending on your tools, technique and recipe. Perhaps nowhere is that more obvious than in the contrast of these two barks. The first bark, a very thin dark chocolate bark with three toppings, is fairly simple to create once you’re comfortable with a recessed icing spatula. (See an example at Amazon.) The second bark is a marble of white chocolate peanut butter and milk chocolate; it is also a gigantic pain in the derriere whose formula is almost completely unsuitable for bark.
To start our discussion, let’s examine the ingredients for the dark chocolate bark:
2 oranges
1 cup water
1 cup white granulated sugar
1 lb 70% Lindt Dark Chocolate, or another chocolate of good quality (e.g. Valrhona), roughly chopped
shelled roasted pistachios, roughly chopped
sweetened dried cranberries
The very first step is to create candied orange zest using the first three ingredients. There are several routes one might take to accomplish this task; the one I’m about to explain is perhaps the easiest, requiring the least amount of time and manipulation. There’s an upside and a downside to this choice, but we’ll discuss the outcome in just a moment.
- Zest the oranges. The best tool for this job is a vegetable peeler. A peeler will yield long, wide strips of zest, which can then be cut any number of ways depending on preference and use.
- Remove any excess pith. Take one of the zest strips and lay flat, outer skin of the orange facing down. Use a paring knife to gently scrape any pith out of the zest and away from you. Rinse and repeat for all remaining zest strips.
- Combine the sugar and water in a sauce pan, then bring to a simmer. Add the strips of zest to the pan and continue to simmer until fully cooked. There are three characteristics of doneness: (a) semi-transparent (b) tender (c) shiny. Once you observe these traits in your zest strips, remove the zest to a sheet pan lined with parchment paper.
- When cooled to room temperature, toss the zest in granulated sugar. Then slice the zest into long thin strips (think chiffonade). See the picture at the top of this article for a preview of the result. NB: For use in chocolate bark, I highly recommend applying an additional rough chop to the zest strips, because the bark will be difficult to break apart into pieces if the zest is in large chunks.
Zest produced in this fashion will be soft enough to eat and fairly sweet. As a bonus, you can also store the simple syrup in your fridge for future culinary uses; the zest will have imparted the flavor of orange to the mixture, which you can use in almond chocolate clusters or even as a sweetener in alcoholic beverages. On the downside (yes, I did mention a downside), you will not completely eliminate the bitter undertones native to the zest. There are other procedures, usually involving multiple dunks in boiling water, which will completely eliminate any bitter residue in the zest. Future experiments may wish to use these processes. However, I find that the zest described in this procedure is completely adequate for dark chocolate bark.
Once you’ve prepared the zest, you can begin melting the chocolate. I prefer to use a bain-marie setup: a bowl suspended over a small amount of water in a pan over low heat. The bain-marie keeps the chocolate warm and viscous, allowing you to melt a large batch all at once and shape the chocolate in increments. If you prefer, you can melt the chocolate in the microwave, but you’ll need to return the chocolate to microwave periodically while you work. It is extremely important for the chocolate to maintain a high viscosity until you’re ready to use the icing spatula; chocolate which is too cool will not achieve the smooth glossy appearance of bark. A bain-marie will melt the chocolate very slowly, but under no circumstances should you turn up the heat from low. Just stir occasionally to hurry the process.
Ladle a small portion of chocolate onto a baking sheet covered with parchment paper. Then, using measured broad strokes, spread the chocolate with your icing spatula. You’ll want to tilt the spatula to the right when you’re sweeping to the left, and vice versa. Finish spreading the chocolate within one minute. Continuing to use the icing spatula beyond this point will cause the surface of your bark to be uneven.
Quickly scatter the toppings onto the surface of the chocolate. You may gently "tap in" the nuts and fruits with the flat of your hand, but after that, leave the bark alone for 20-30 minutes. Then test the chocolate by pulling the parchment paper away from the edge of the chocolate. When the two easily separate with no messy residue, you can remove the bark and break into small pieces.
Look for further remarks on the bark in the Thanksgiving Roundup article coming shortly.
The recipe for white chocolate peanut butter bark is taken from Free Range Living, which in turn obtained the recipe from Canadian Living Magazine. I hate to be harsh, but this formula is totally unsuitable for bark. Never again. (I think that’s the first time I’ve said anything so utterly damning about any recipe.) First: the bark will not set on its own at room temperature. You need to place every single sheet of bark into the freezer. I don’t know about you, but my freezer is packed. All my homemade bread is in there, not to mention my stock, my ice cream, my pie crusts,… Need I go on? To its further damnation, the peanut butter white chocolate will actually start to un-set within minutes of removing from the freezer. So you have a gooey, sticky mess before you or your guests can consume the bloody thing. Ugh. Second: notice anything strange in the picture? The white chocolate actually separates from the peanut butter along the swirly edges. The discoloration is noticeable and is definitely not eye-candy. Third, and this is not really the fault of the recipe: how the bloody hell do you marble chocolate and still obtain thin, beautiful pieces of bark? I managed to work out a fairly irregular system of using the back of a spoon to smooth out the individual colors, before dragging a toothpick through the chocolate to create swirls. Totally messy and not at all systematic. I felt like I was at art school for preschoolers.
On the upshot, the peanut butter chocolate bark tastes good. Just don’t plan on serving this dessert to your friends or neighbors.